Getting a good bandage is a vital part that every boxing, martial arts, kikcboxing or any other combat discipline should know. Bandaging ourselves well will allow us to properly practice our sport and that is why we must learn how to do a good bandage.
The first of the reasons to know how to make a good bandage has to do with the integrity of the rival. If they are going to fight (it does not matter if it is amateur or professional), an incorrect bandage could lead to harsh sanctions, since performing a bad bandage would put the opponent in danger to the point that they could even have problems with the law.
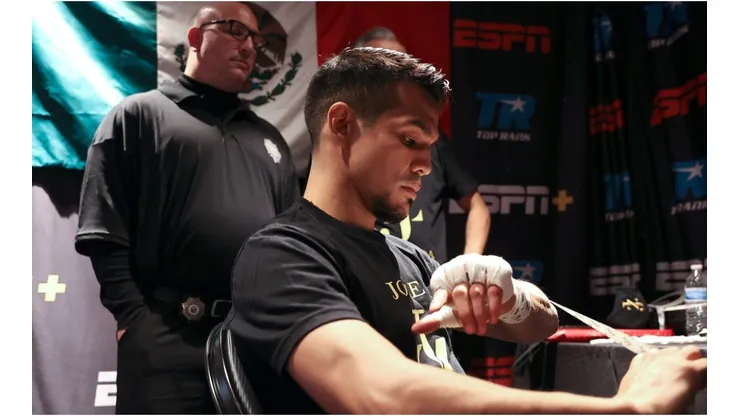
The second reason is rather personal. Properly wrapping your hands is necessary to be able to protect the phalanges and knuckles, something that is important both in professional boxing practice and at amateur levels. Learn here how to do it correctly in order to protect your hands from possible injuries. Here we leave a guide in 28 steps.
The steps to follow
First step: massage and joint mobility are carried out on the forearm, phalanges and metacarpals.
Second step: with the fingers of the hand extended and separated, without squeezing, the boxer’s forearm is wrapped with the gauze bandage until it reaches the wrist.
Third step: from the wrist the bandage is brought to the knuckles, wrapping them without pressing, with two turns. The fingers should be separated from each other and in full extension.
Fourth step: You must go from the knuckles diagonally towards the wrist and from there under the hand, go to the thumb and wrap it with the bandage making a complete turn.
Fifth step: the bandage remains in the upper area and goes back to the wrist to surround it and go back to the thumb, wrapping it again but this time from the inside out.
Sixth step: The bandage must be brought back to the wrist, where the rest of this first bandage is discharged.
Seventh step: a new bandage is wrapped around the wrist 3 times. The dressing or gauze is placed over the knuckles and the end closest to the dressing is adjusted to the knuckles, wrapping the bandage around them 2 times.
Eighth step: wrap the dressing over itself 3 times and secure it with the bandage.
Ninth step: from the knuckles the bandage is brought to the wrist, it is turned once and from there the bandage is directed towards the middle knuckle, wrapping the finger with the bandage and returning to the wrist.
Tenth step: the wrist is circled again and the bandage is directed towards the little finger to surround it with it and repeat the step with the index finger. In this step it is important to place the dressing in front of the knuckles every time the fingers are encircled and the bandage is directed towards the wrist, making sure that when the padding is tightened it is in the correct position.
11th step: the last bandage with which the dressing is adjusted should be placed, tensioning horizontally from the metacarpal of the thumb towards the metacarpus of the little finger.
12th step: the wrist is turned around and the previous step is repeated twice.
13th step: the stage of bandaging with a gauze bandage ends and the end of the bandage is held with a piece of tape at the level of the forearm.
Before applying the tape, wait a moment for the bandage to perceive the actual tension of the bandage. The bandages are accommodated on the inside with the fingers, mobilizing any possible tension.
14th step: a 20 cm ribbon is divided into 3 equal parts throughout its length to be used as straps that will pass between the knuckles.
15th step: the straps are applied in the three between-fingers.
16th step: the forearm is surrounded with tape, without pressing at any time.
17th step: the thumb is wrapped with the tape, taking the entire metacarpus from the outside to the inside of the finger.
18th step: from the thumb, the tape is brought to the wrist to go around it and return to the same finger that must be surrounded but this time from the inside area. It is advisable to fold the tape around the arch of the finger so that it does not interfere when closing the fist. Then the tape should go to the wrist and go around it once more.
19th step: the tape goes from the wrist to the pasterns, circling them 2 times, without covering the knuckle area.
20th step: tape is applied from the scaphoid bone to the distal end of the fifth metacarpus.
21st step: another tape is applied from the scaphoid bone until reaching the distal end of the fourth metacarpus.
22nd step: another tape is applied from the scaphoid bone until reaching the distal end of the third metacarpus.
23rd step: from the scaphoid bone, another tape is applied until reaching the distal end of the second metacarpus.
24th step: from the pisiform bone, a tape is applied to the distal end of the second metacarpus.
25th step: from the pisiform bone, a tape is applied to the distal end of the third metacarpus.
26th step: tape is applied from the pisiform bone to the distal end of the fourth metacarpus.
27th step: once all the diagonal tapes have been placed, the transverse ones begin to be placed. It should start from the outer edge of the fifth metacarpus, to the outer edge of the second metacarpus, going from 1 cm before the knuckles to the wrist.
28th step: the wrist is wrapped with the tape until reaching the beginning of the bandage on the forearm
* Information extracted from the website g-se.com